

The parking area in front of the house often decides how the whole exterior reads before anyone even steps inside.
Budget tiles can hold up to daily use and still tie in with the rest of the facade when the color and finish are chosen with care.
Some surfaces look fine on paper but wear differently once the cars sit on them every day.
I have noticed that matching the tile edges to the existing driveway border makes a bigger difference than swapping out the whole surface at once.
Trying one small section first shows whether the material will actually suit the light and traffic on the property.
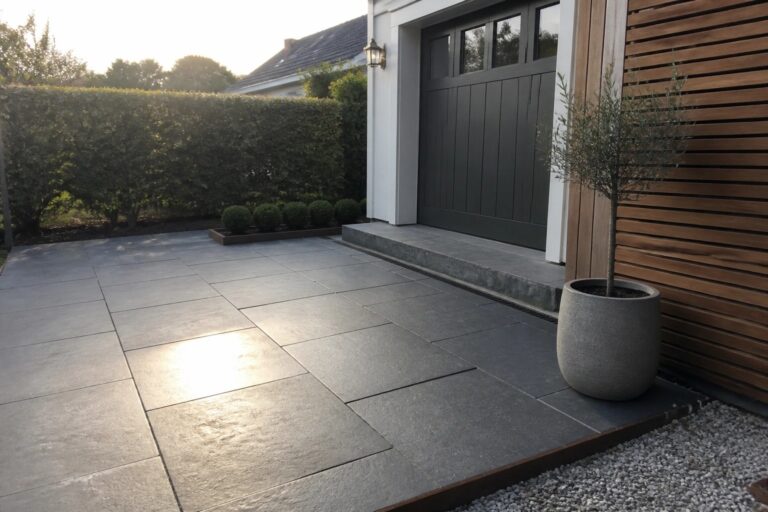
Dark Large Format Tiles For Driveways

Large dark tiles give a driveway or entry area a solid, finished look without needing fancy materials. They hide tire marks better than lighter colors and make the whole space feel more put together, even when the rest of the yard is simple gravel and a few pots.
These tiles work best on homes with clean lines and modern or updated exteriors. Keep the edges neat with a gravel border or metal trim so water drains properly and the surface stays low maintenance over time.
Checkerboard Grass And Paver Paths
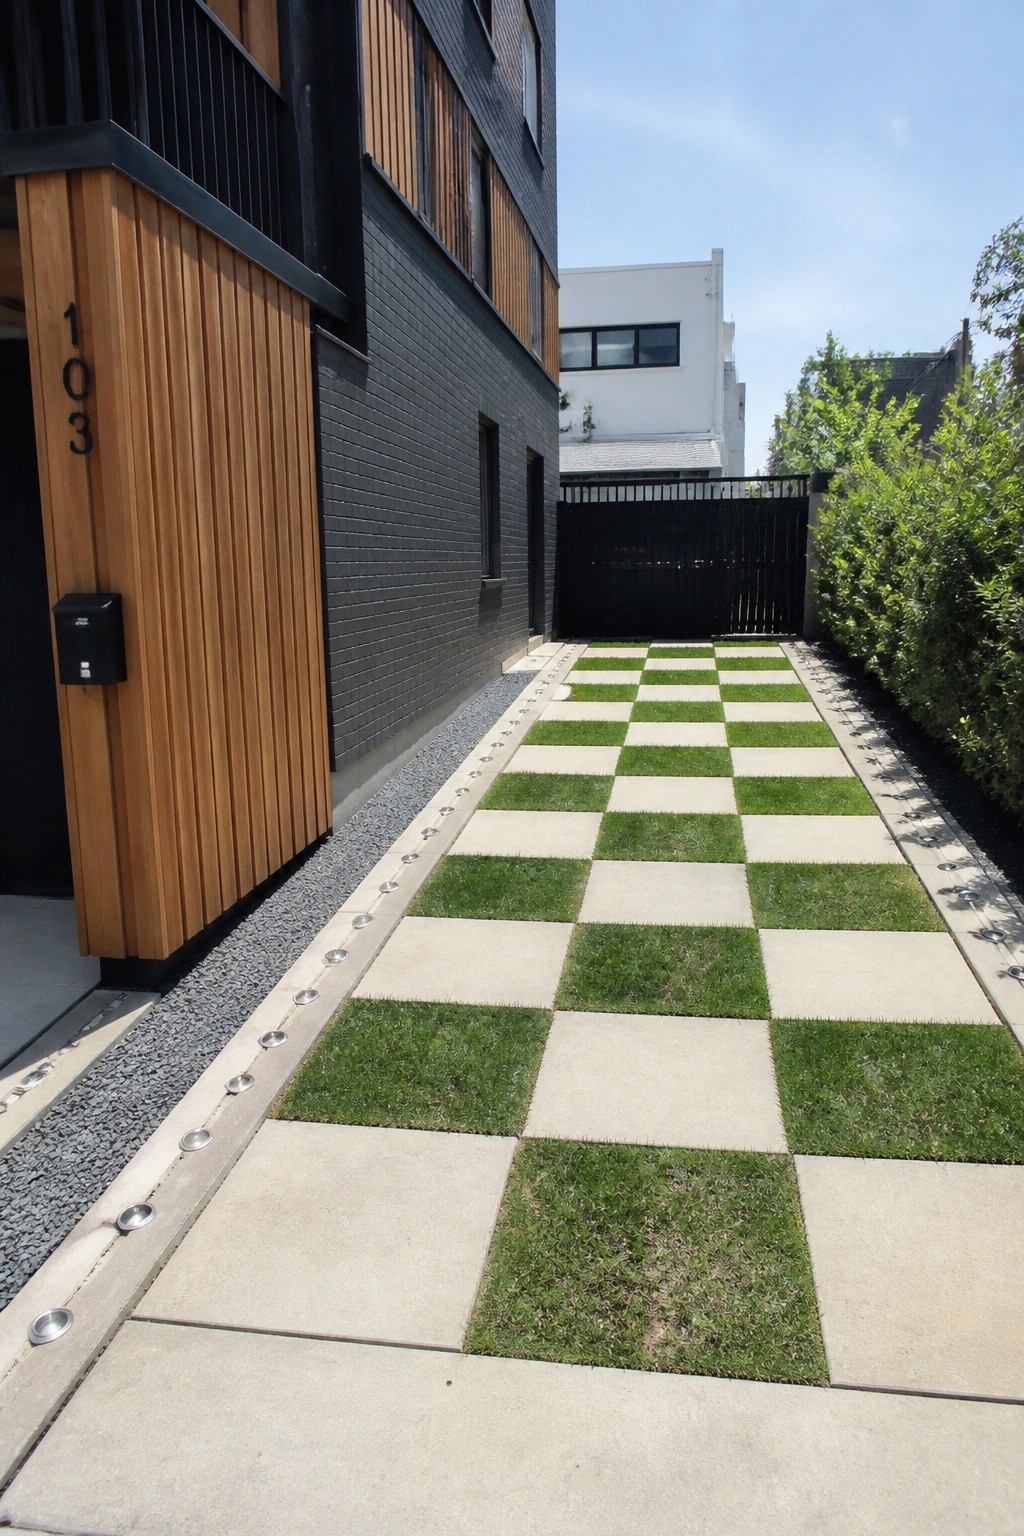
A checkerboard layout of grass squares and concrete pavers gives a clean look without the cost of a full paved surface. It keeps some green in the space while still handling foot traffic and light vehicle use.
This setup works best in narrow side entries or short driveways on modern homes. Keep the squares even in size and add a simple border light if you want the path to stay usable after dark.
Brick Pavers With Gravel Strips

This setup uses rows of brick pavers down the center with gravel filling the sides. It breaks up the surface so the driveway does not feel like one solid slab, and the mix keeps costs down while still looking intentional.
It suits homes with straight driveways or side entries where you want a bit of pattern without laying pavers everywhere. Keep the gravel edges wide enough for drainage and choose a brick color that matches the house trim so the whole thing stays simple to maintain.
Herringbone Pavers For Driveways
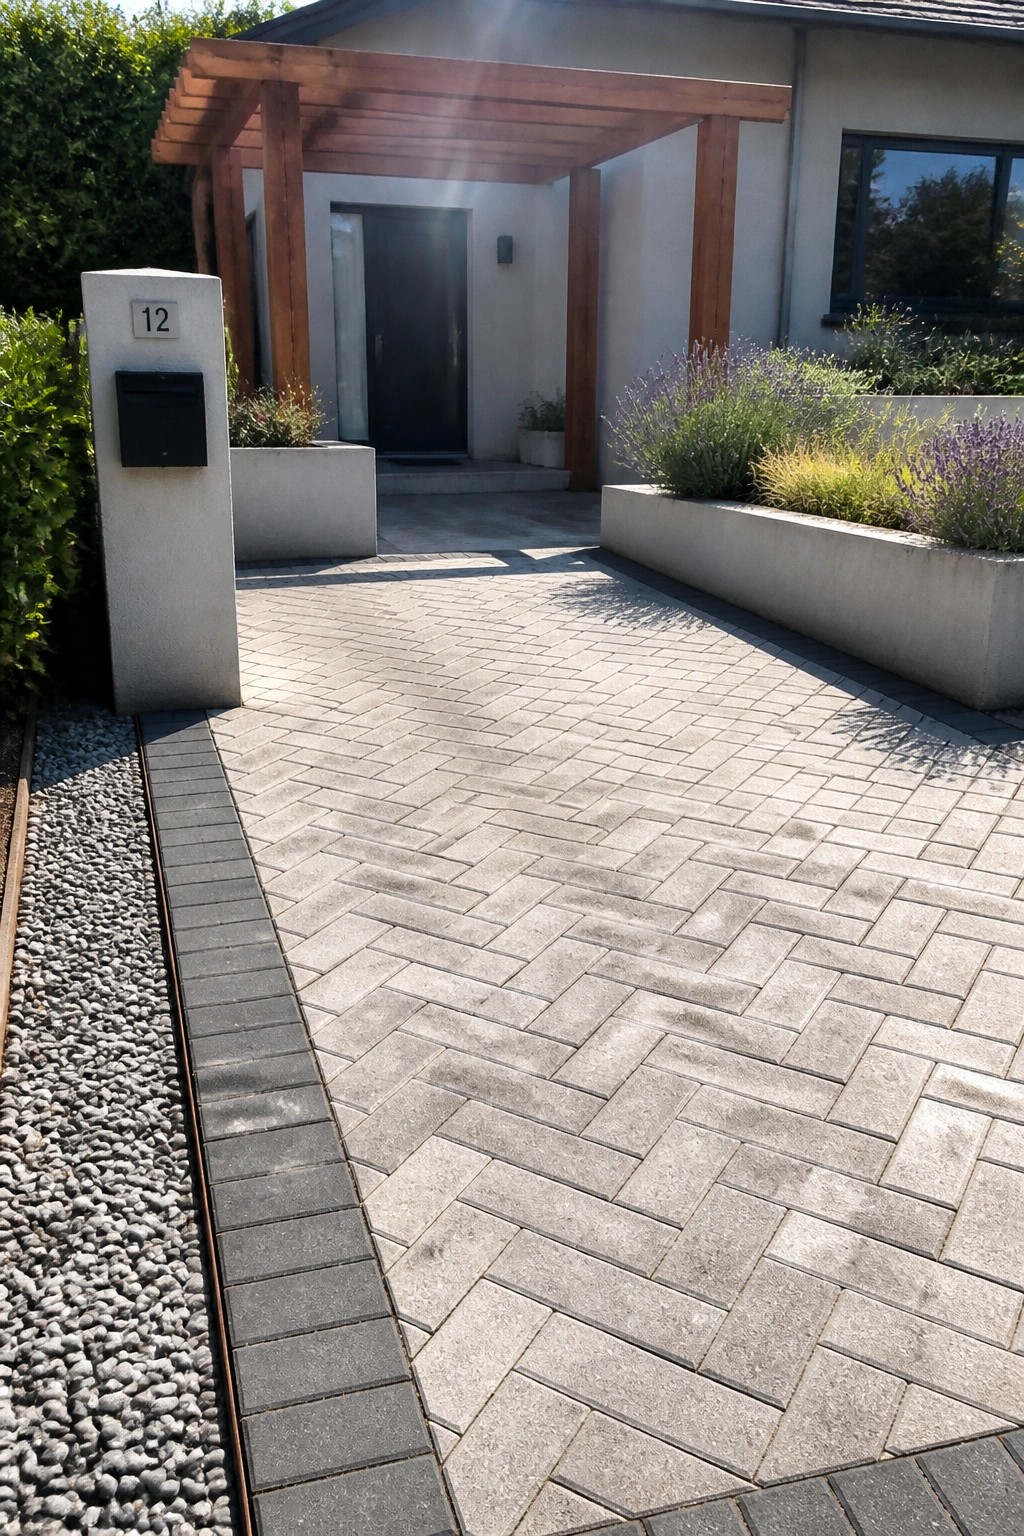
Herringbone paving gives a driveway a neat and finished look that feels more expensive than it really is. The pattern also helps lock the tiles together so the surface stays flatter under regular car use.
This works best on homes with clean lines and simple architecture. Stick to one color of pavers and add a simple border along the edges to keep the whole thing looking tidy without extra cost.
Pavers Set Into Gravel For Paths
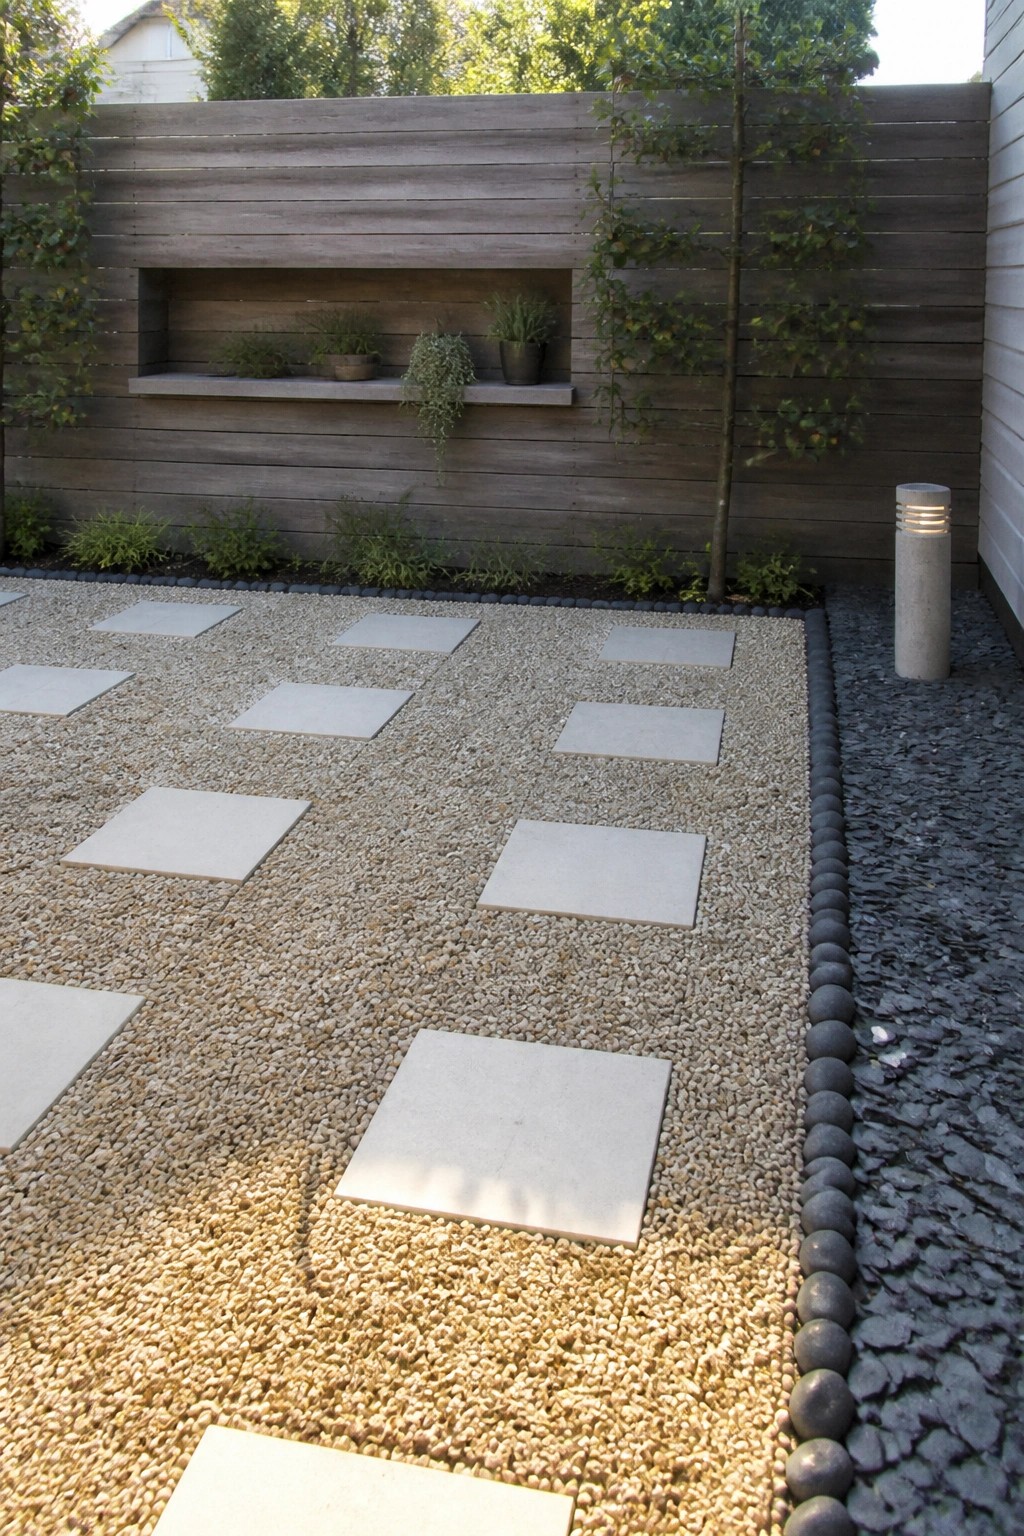
Many people like setting large square pavers into gravel when they need a path or small parking spot. It gives a clean look without the cost of a full paved surface and the gravel helps with drainage.
This works well along the side of a house or in a side yard where you want something simple and low maintenance. Use a solid base under the gravel so the pavers stay level and add a border of darker stones to keep the edges tidy.
Pebble Joints Between Pavers
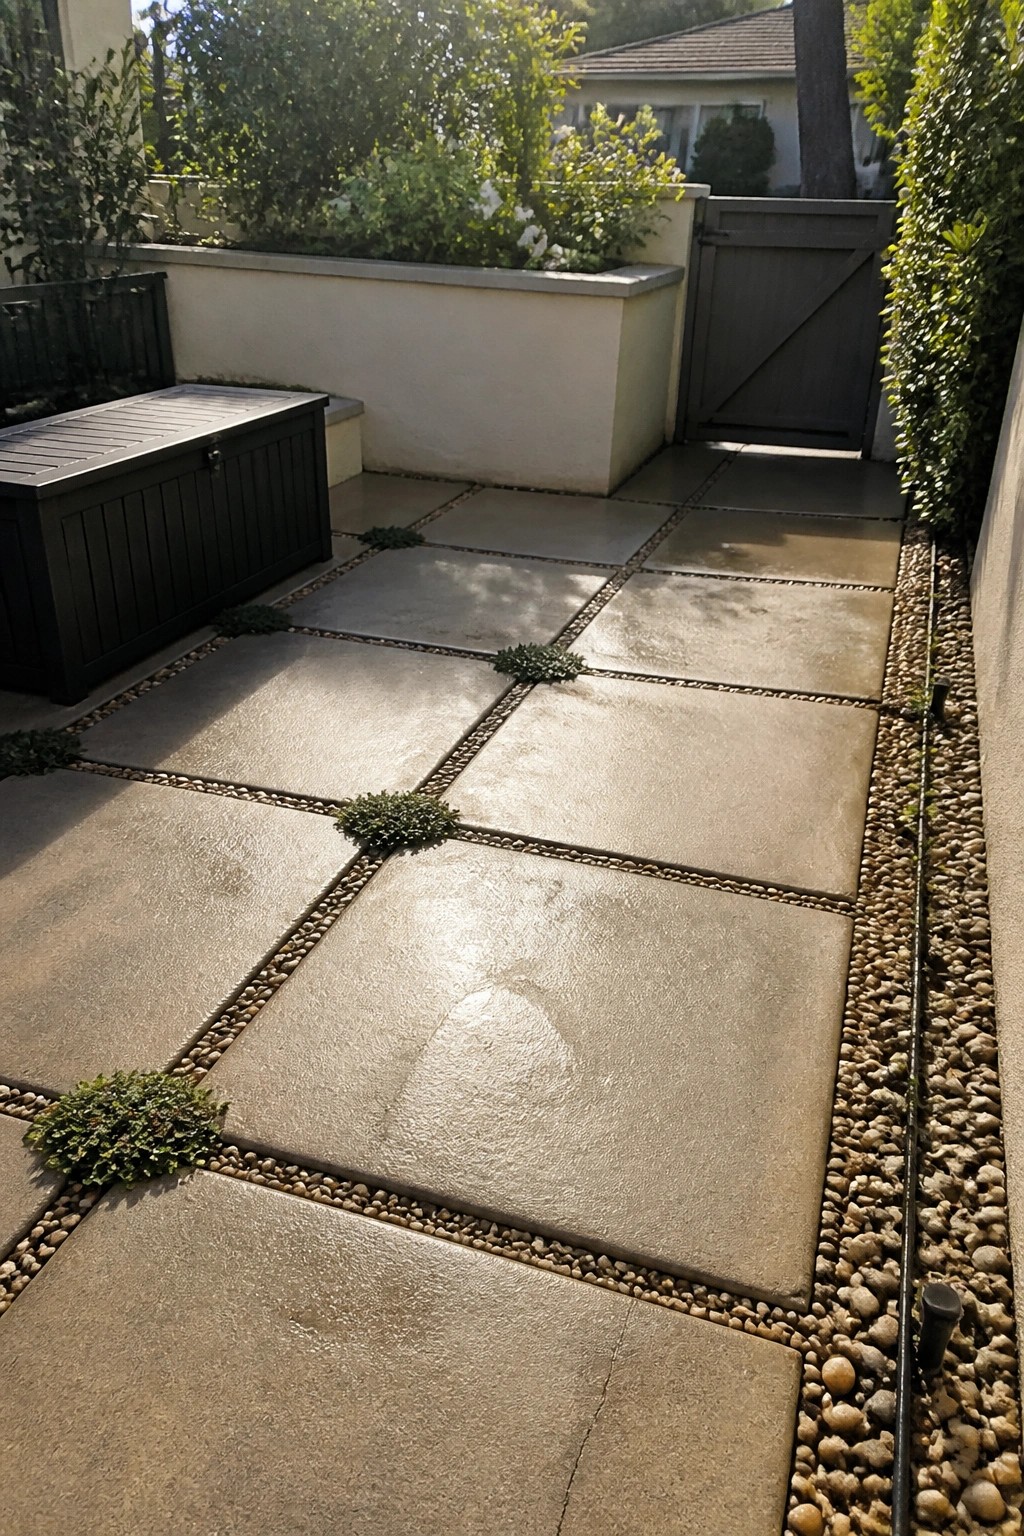
Large pavers laid with pebble-filled gaps give a path or patio more texture than a solid slab. The small stones break up the surface and make the whole area feel more finished without extra cost.
This layout works best on flat walkways or small patios where drainage matters. Keep the pavers simple and let the pebble lines do the work, then tuck a few low plants into the gaps if you want a softer edge.
Herringbone Brick Pavers For Driveways

Brick pavers laid in a herringbone pattern give a driveway or parking area a finished look that feels more expensive than it is. The pattern holds up well to cars and adds texture without needing fancy materials or extra trim.
This works best on smaller driveways or side parking spots where the pattern can be seen up close. Keep the edging simple with gravel and a few plants so the bricks stay the main feature.
Large Tiles Set In Gravel

Large square tiles laid with gravel between them create a path that feels solid underfoot but costs less than a full paved surface. The spacing breaks up the look so it does not feel heavy, and the gravel helps with drainage on its own.
This approach suits side yards, narrow passages, or garden routes where you want something low maintenance. It works best with a simple planting scheme on either side and a slight slope so water moves away from the house.
Textured Tiles For Driveways

Textured aggregate tiles give a driveway more character than plain concrete without pushing the budget too high. The speckled surface catches light in a way that feels more finished, and the material holds up well to cars and weather.
These tiles suit homes with clean lines and simple landscaping. Keep the layout flat with thin metal or stone strips for separation, and add a low border of pebbles if you want extra definition without extra cost.
Mix Neutral Tones Across Your Paving Tiles

Mixing a few soft shades in your paving tiles gives a driveway or side path more depth without extra cost. The gentle blend of beige, pale green, and warm pink keeps the surface from looking flat or too stark. Many people find this approach feels calmer than a single solid color.
This works well on homes with simple exteriors or coastal styles where you want the hardscape to blend rather than stand out. Lay the tiles in a loose running pattern and keep the edges clean with a light border. It suits smaller lots or narrow side entries where you need something practical but still easy on the eye.
Use a Narrow Planting Strip Between Pavers
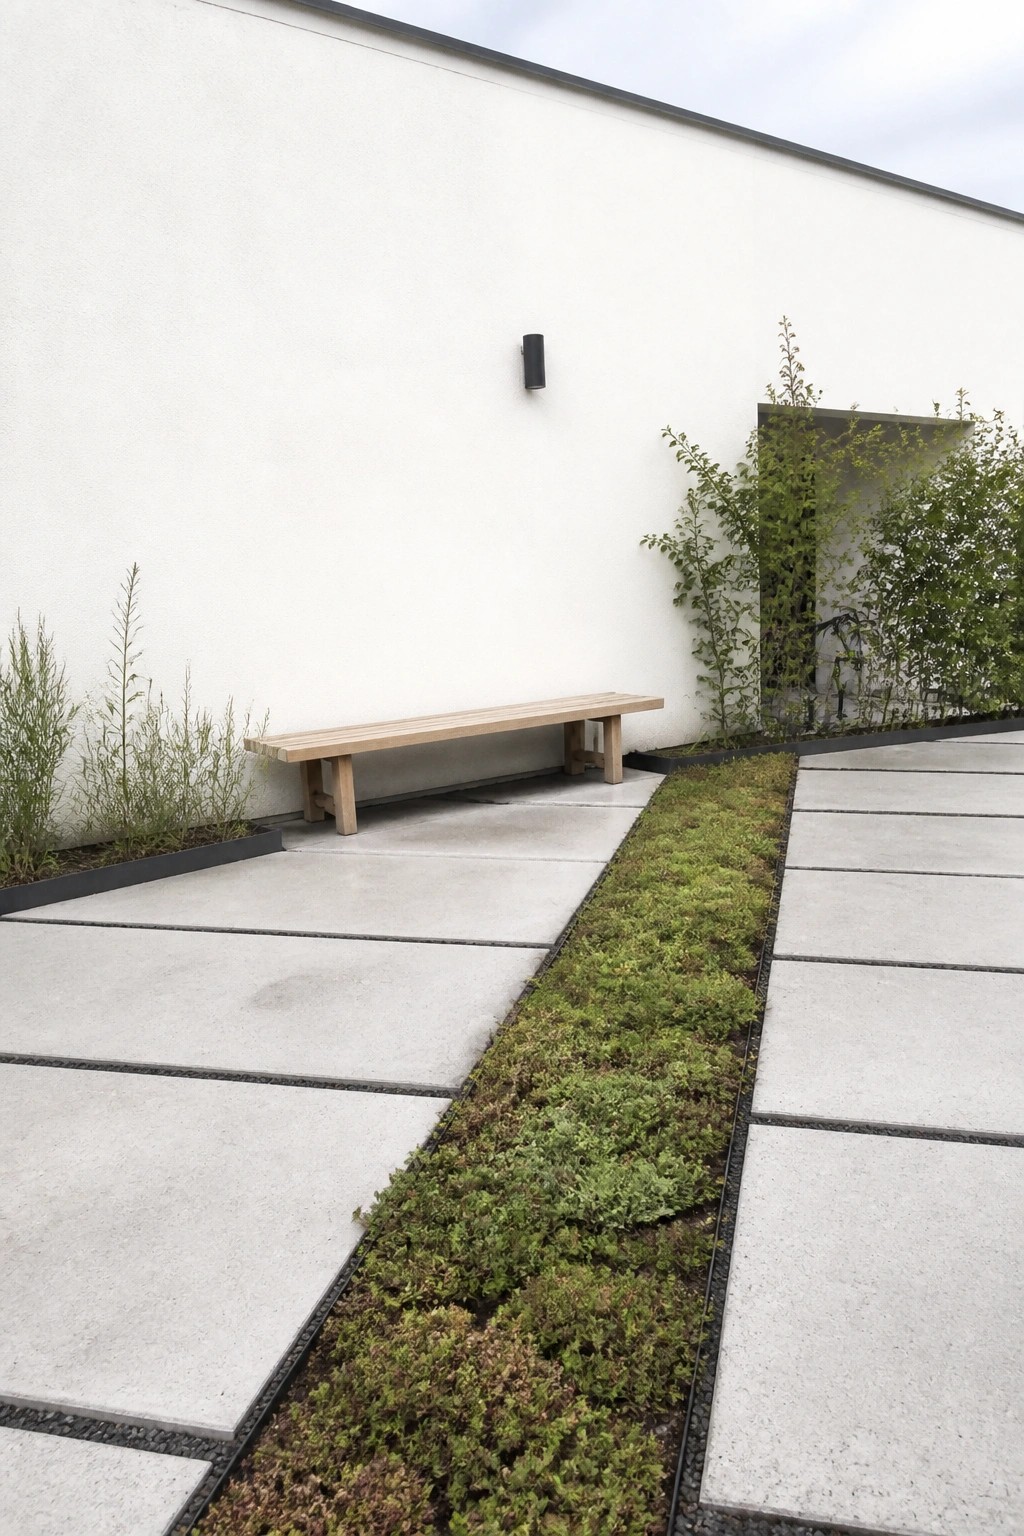
A simple strip of low ground cover running between large concrete pavers adds texture and breaks up the hard surface without adding much cost. It keeps the path looking clean and modern while letting a bit of green soften the overall look.
This works well along side paths or smaller drive areas on homes with modern or minimal exteriors. Stick to tough, low-growing plants that handle some foot traffic and dry spells. Keep the strip narrow so it stays easy to maintain and does not interfere with walking or parking.
Grid Pavers Filled With Gravel
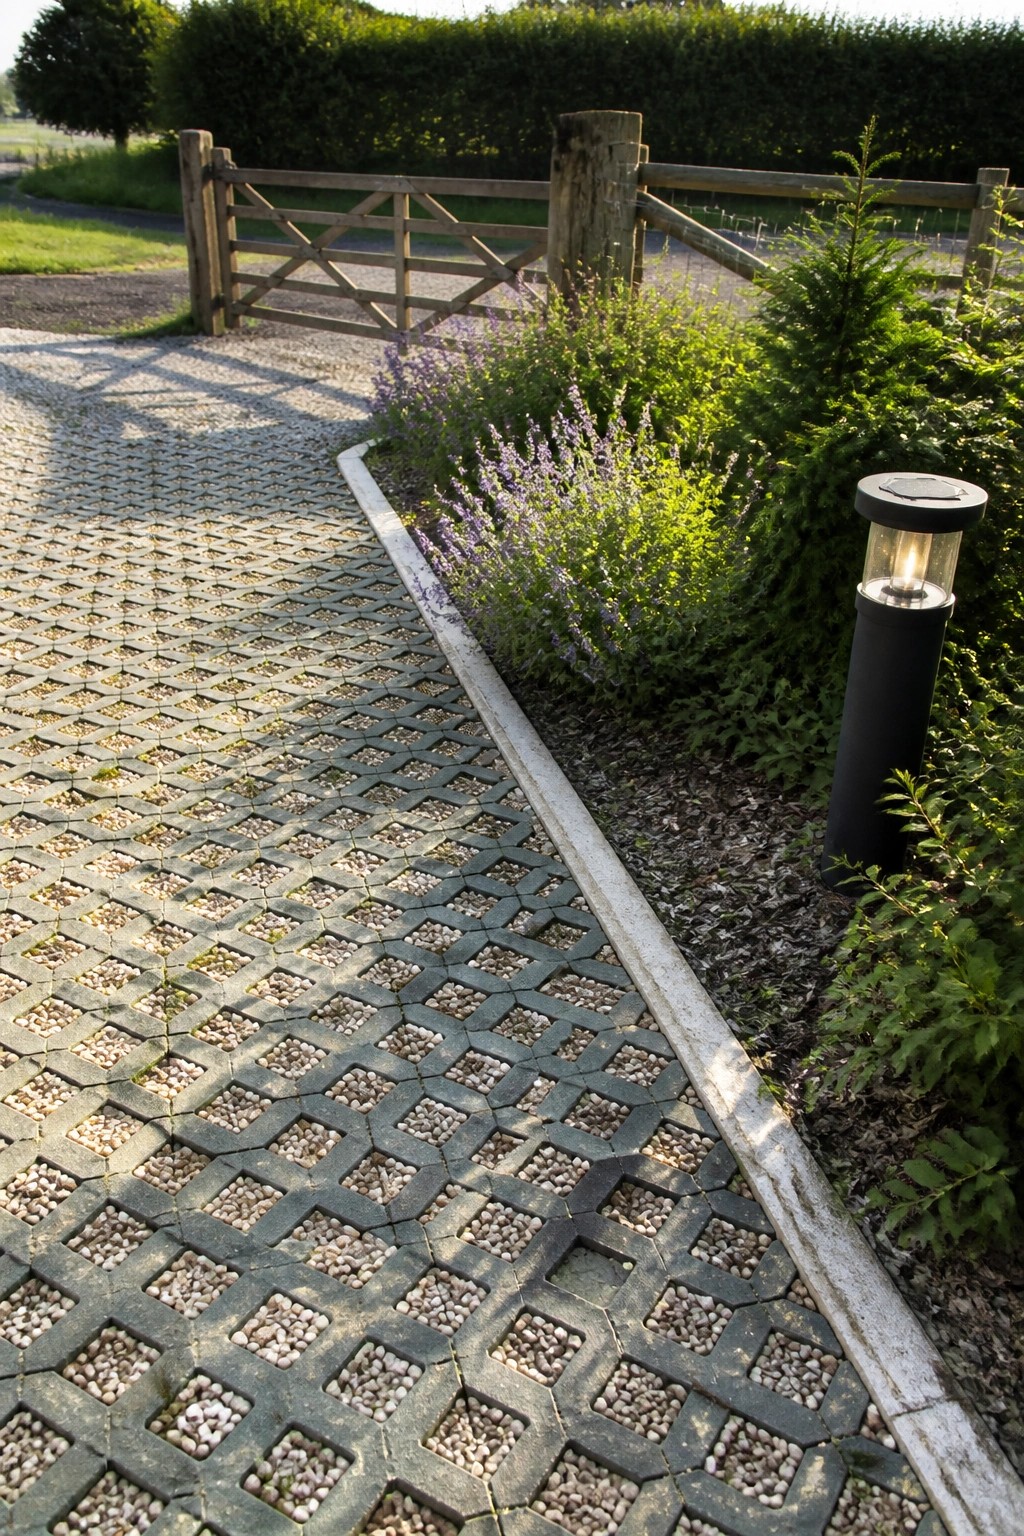
These grid tiles give you a firm surface that still lets water drain through. The pattern keeps the gravel from shifting around, so the path stays level even after heavy use or rain.
They suit long driveways or side paths on homes where you want something simple but tidy. Lay them on a compacted base, fill with small stones, and add a clean edge to keep the look neat over time.
Mix Paver Sizes For A Cleaner Look

Running a narrow band of smaller stones between larger pavers gives a simple path or driveway more structure without costing much extra. The smaller pieces break up the surface so the whole area feels more finished and less like one solid slab.
This approach works best on straight runs near the front door or along a side entry where the ground gets noticed. Stick to colors that sit close together and keep the band narrow so it stays easy to install and maintain over time.
Mix Patterned Tiles Into Gravel Paths
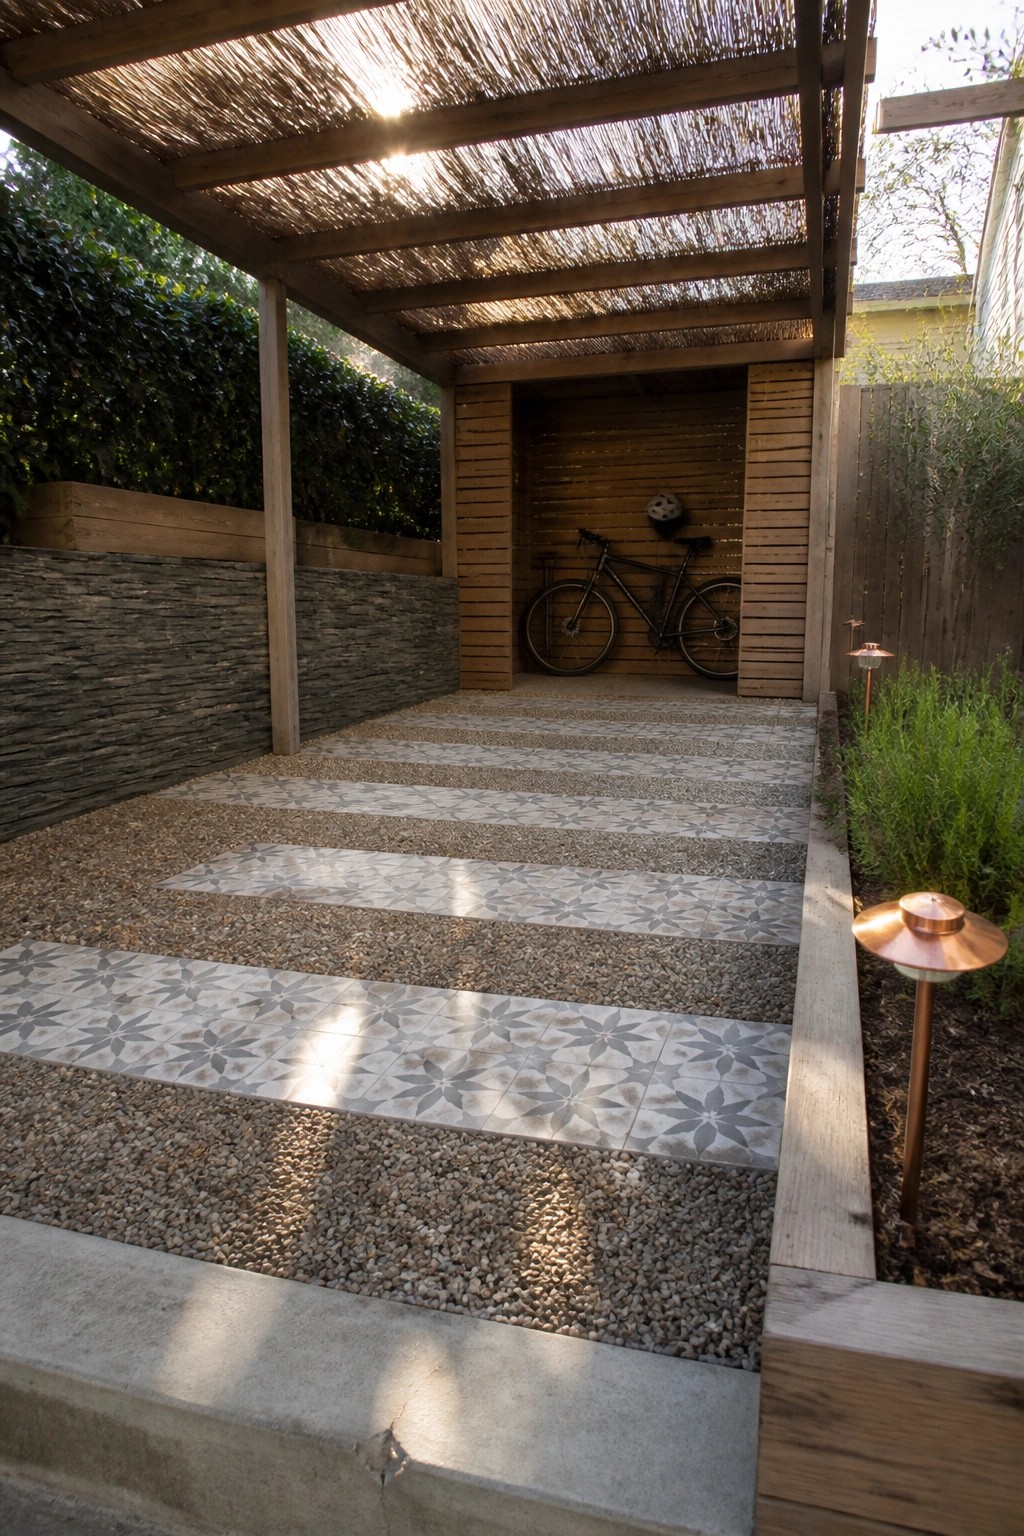
Many people like using rows of patterned tiles set into gravel for a walkway. It gives the path a finished look while keeping most of the surface cheap to cover and easy to maintain.
This approach works best along the side of a house or in a narrow garden where you need a clear route but do not want to lay full paving. Space the tile strips evenly and use a simple gravel fill so the whole thing stays level and drains well.
Define the Edge With a Darker Paver Border

A single row of darker pavers along the curve gives the whole paved area more structure and makes it feel deliberate rather than just a flat stretch of concrete. The contrast keeps the space from looking too plain while still using basic, affordable materials.
This works best on driveways or parking pads that have a gentle bend, since the border helps the eye follow the shape. Use the same paver style in two tones so the look stays simple and cohesive instead of busy. It suits homes where the parking area sits next to planting beds and needs a tidy transition.
Mix Terracotta Tiles With Gravel Patches
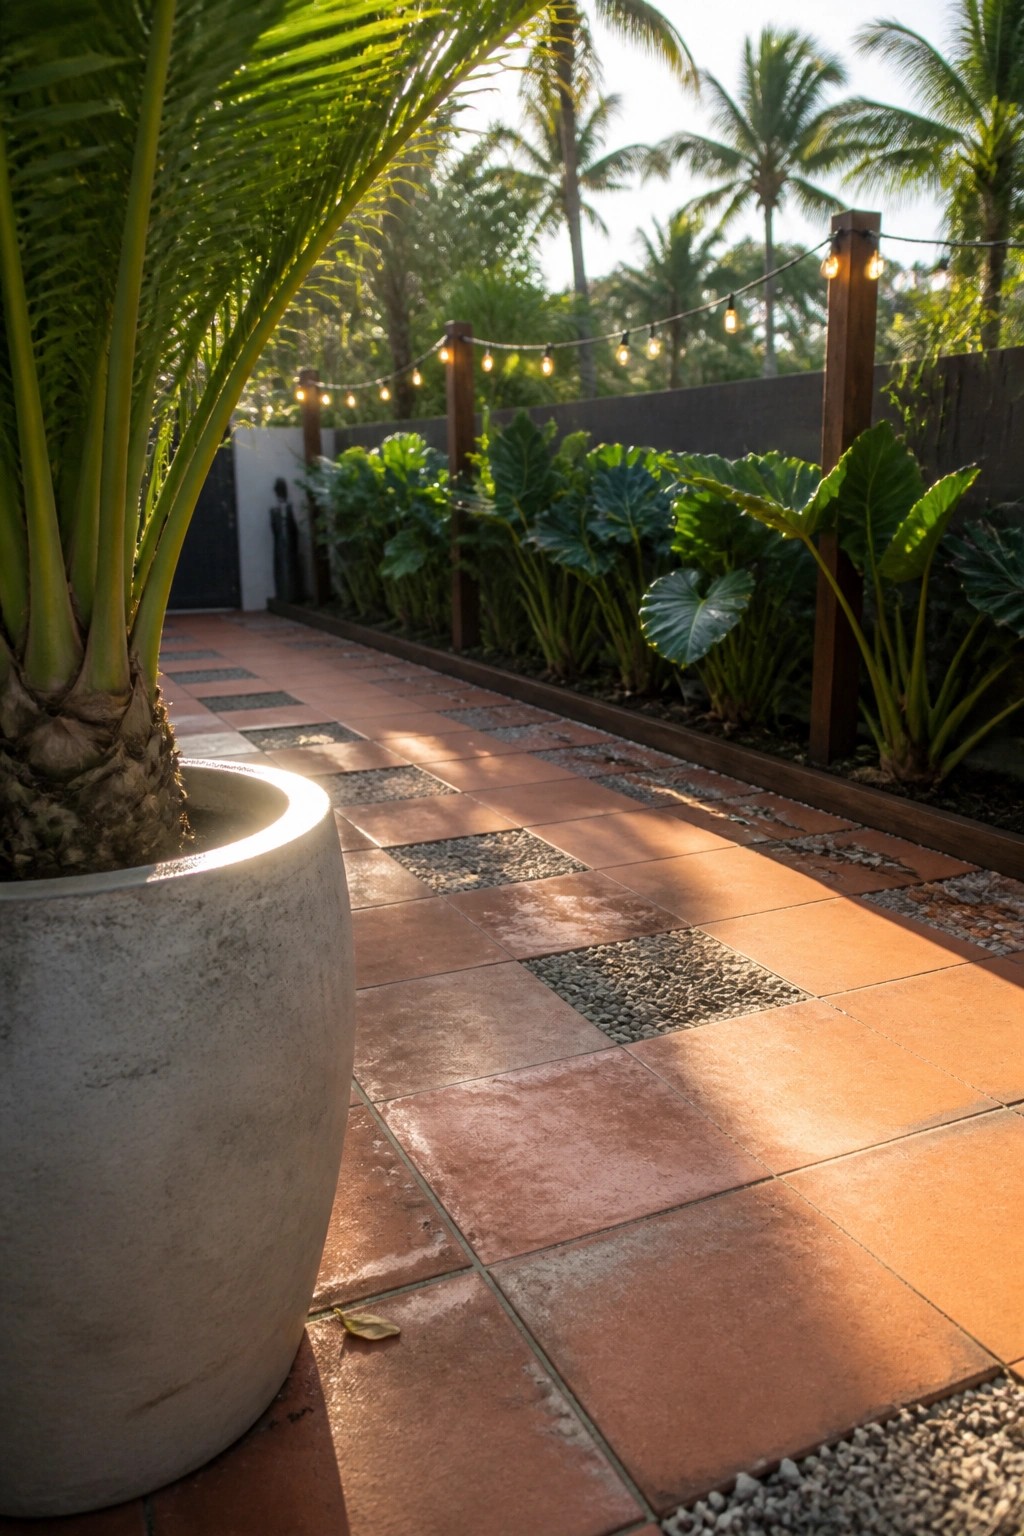
This layout keeps an outdoor floor interesting without needing expensive materials. Large terracotta tiles cover most of the surface for easy walking and cleaning, while the gravel squares break up the pattern and add texture.
It suits patios in sunny areas where drainage matters. Keep the gravel sections small so chairs and tables sit steady and the path stays comfortable underfoot.
Slate Tiles For Side Entry Paths
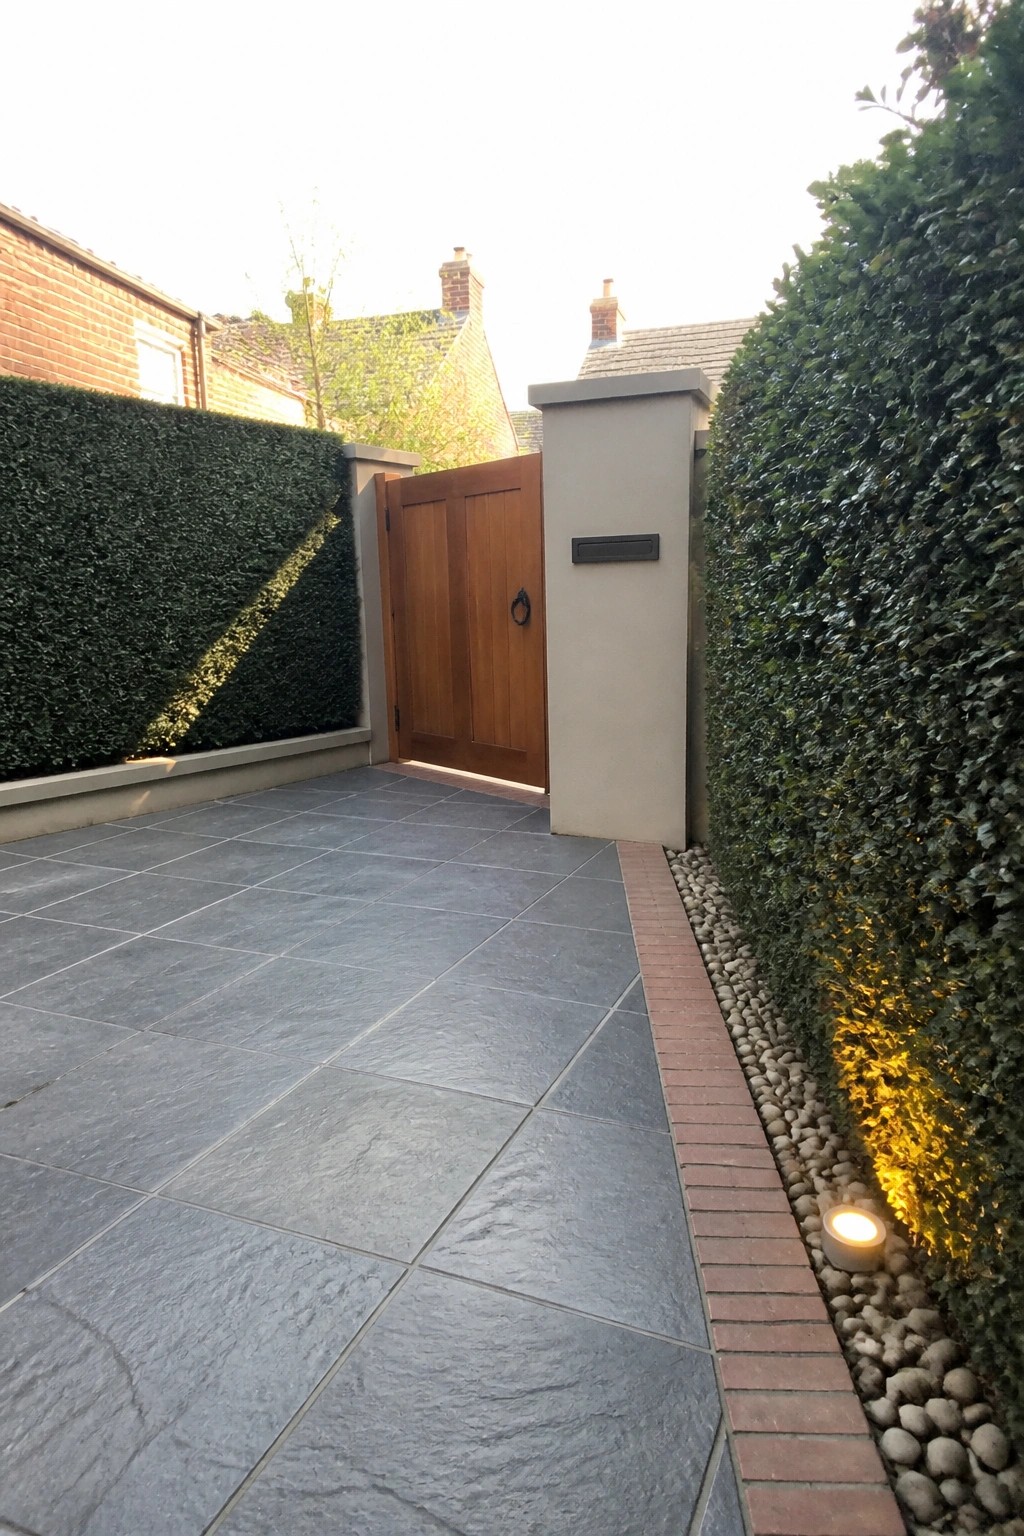
Large gray stone tiles give a side path a clean, finished look that feels more expensive than basic concrete or pavers. The big format reduces the number of joints, so the surface stays smoother and easier to keep clean over time.
These tiles work best on narrow routes next to the house where you want something practical but still neat. Pair them with a simple brick border to contain the edges and add a bit of warmth without much extra cost.
Pebble Tiles With Wood Strips

Pebble tiles create a textured surface that holds up well outside and still looks polished. Many people like them for parking spots or side areas because they cost less than stone but give a similar finished feel.
Adding a few wood planks down the middle breaks up the pattern and makes the space feel more inviting. This mix works best on patios or narrow outdoor zones next to the house where you want something practical but not plain.
Stripe Your Driveway With Tiles And Gravel

Alternating bands of large tiles and gravel give a driveway a clean, modern look without needing expensive solid paving. The pattern breaks up the surface visually and makes the whole area feel more designed than a plain slab of concrete ever would.
This approach works especially well on long or narrow driveways where a single material can feel flat. Use affordable concrete tiles for the wide sections and a simple gravel or pebble fill between them. Just make sure the bands line up straight and the gravel sits slightly lower so water drains properly.
Circular Tile Patterns For Driveways
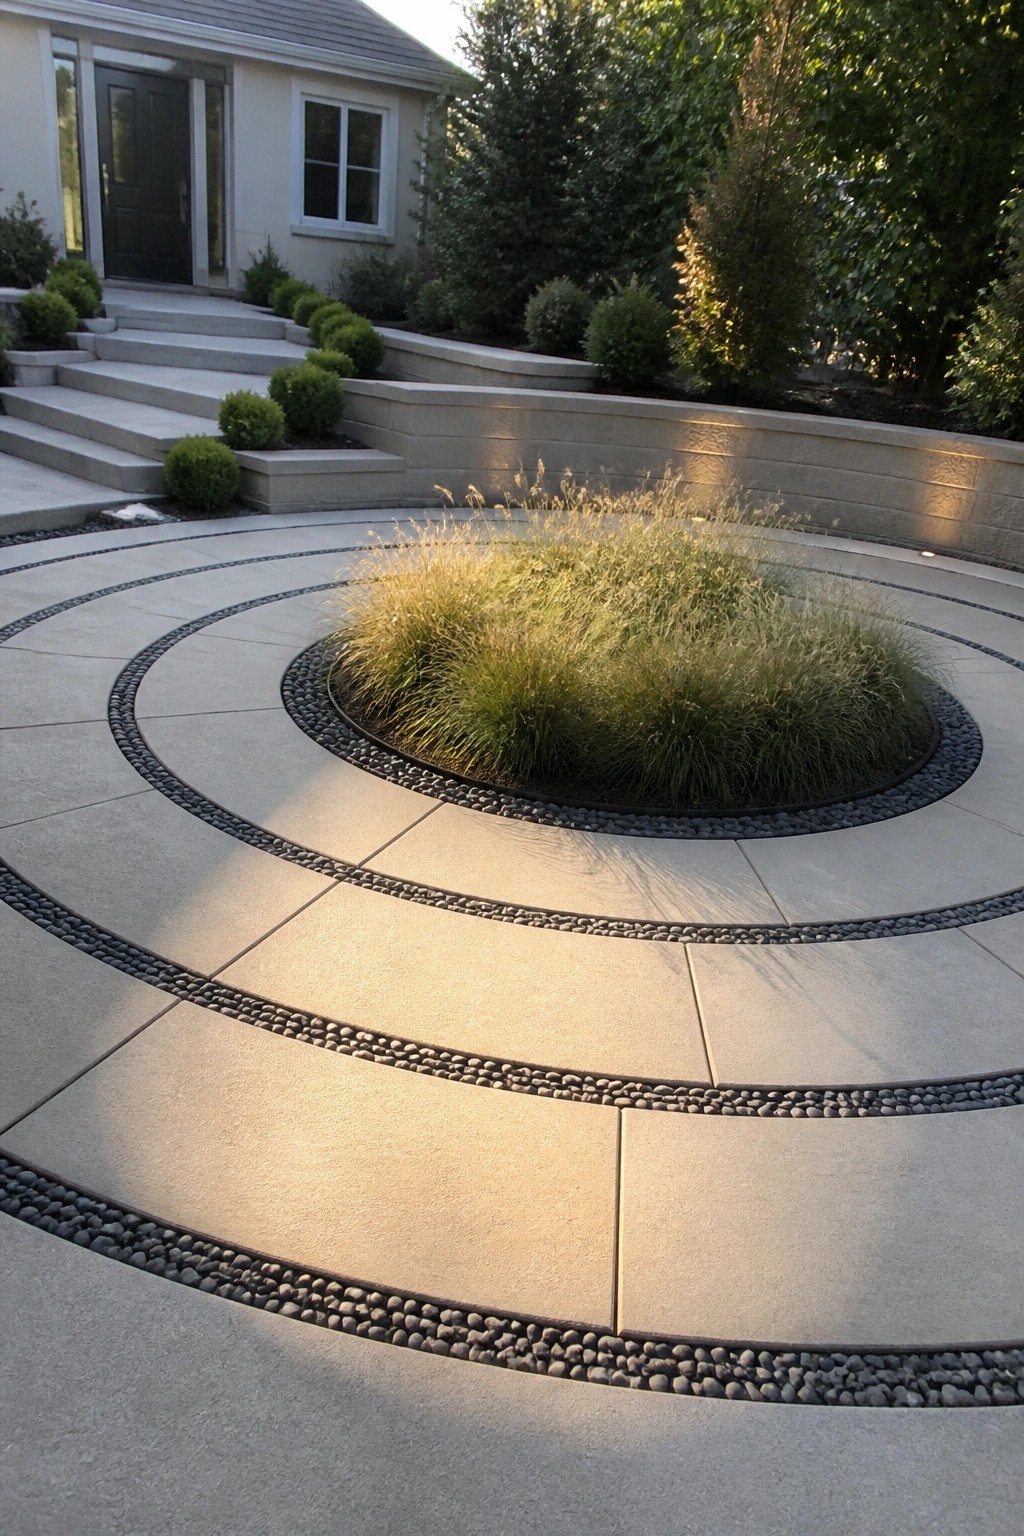
Large concrete tiles arranged in wide concentric rings can turn a basic parking pad into something that feels more intentional and finished. The pebble strips between each ring add texture without much extra cost and help break up the surface so it does not look like one solid slab.
This layout works best on a flat or gently sloped area in front of the house where you need room to turn around. Keep the rings simple and use the same tile throughout so the pattern stays clean and the material list stays short.
Frequently Asked Questions
Q: How long before these tiles start to show wear from daily use?
A: Most hold up for at least five years if you choose the thicker ones. Rotate your parking spot now and then to spread out the pressure evenly. That small change keeps everything looking fresh longer.
Q: Is it hard to replace just one tile if it gets damaged?
A: Not at all. Lift the bad one out with a flat tool and pop in a new one. The rest stay in place without any fuss.
Q: What about weeds growing between the tiles over time?
A: Lay a weed barrier underneath before you start. This stops most growth right at the source. Pull any stragglers by hand every few months to stay ahead.
